I Got Java 25 Running on the RISC-V BeagleBoard BeagleV-Fire
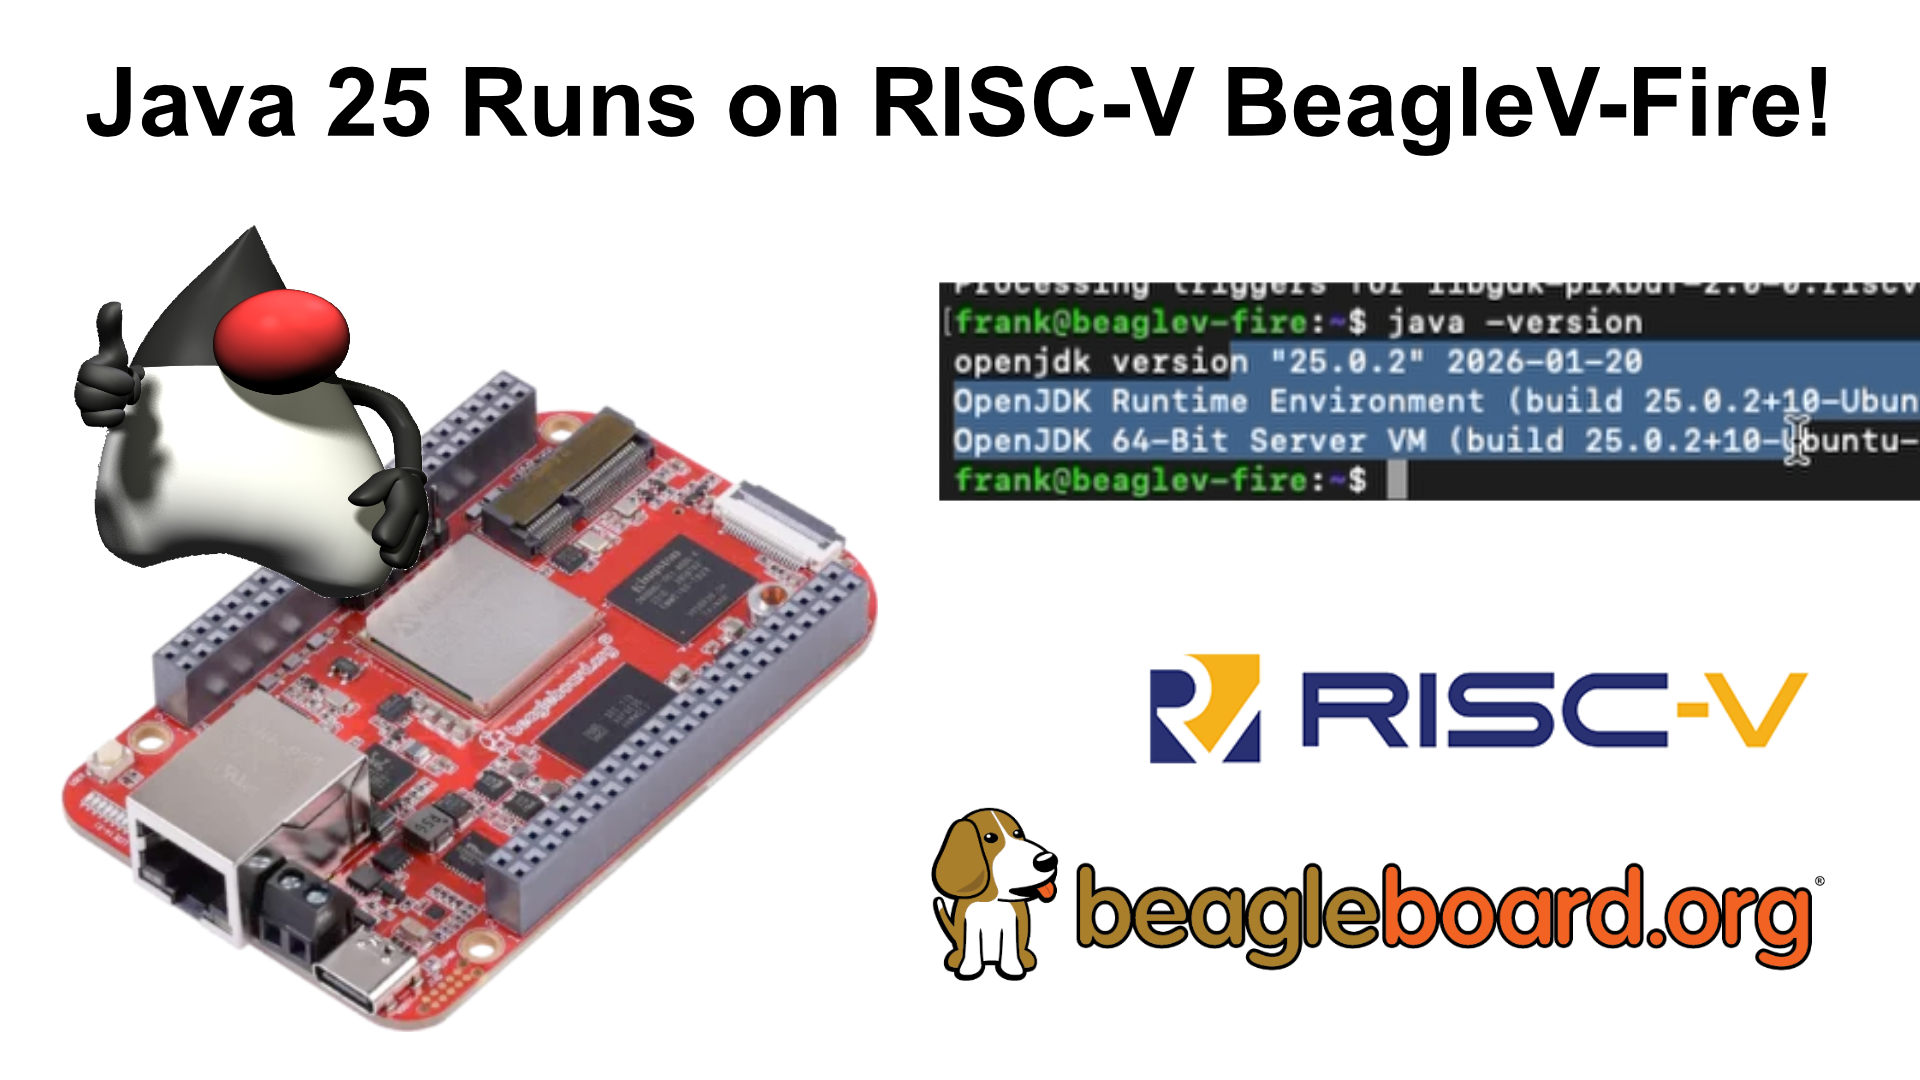
After my initial struggles with the BeagleV-Fire in a previous video, I succeeded in getting Java 25 running on RISC-V-powered BeagleV-Fire! Let me walk you through the journey and the steps I took to make it work.
The Challenge
In my earlier blog post and video about several BeagleBoards, I demonstrated that Java, JavaFX, and even Pi4J worked perfectly. That’s expected, since ARM processors, like those in Raspberry Pi boards, have run Java reliably for years.
However, the BeagleV-Fire with its RISC-V processor presented a different story. The board came pre-installed with Ubuntu 23, and I hit a wall immediately. The apt repositories were outdated and no longer available, making it impossible to install Java or update the system to a newer Ubuntu version.
The Solution: BeagleBoard Imaging Utility
The key to solving this problem was updating the operating system using the BeagleBoard Imaging Utility. Unlike Raspberry Pi boards that use SD cards, the BeagleV-Fire has eMMC storage with the operating system pre-installed. This means you need to replace the board’s existing OS with a newer version. The process took about half an hour in real time (though I’ve edited the video down significantly), including updating the system and installing all the latest dependencies.
Serial Connection Setup
As described on the BeagleBoard Documentation > Boards > BeagleV-Fire > Quick Start, you need a serial connection to see what the board is doing and interrupt it at the right moment to make it accessible from the Imaging Utility. I used a DSD TECH USB to TTL Serial Cable.
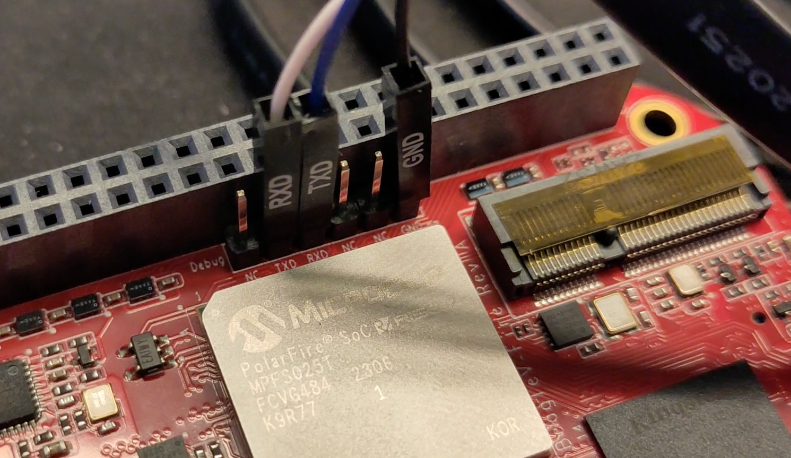
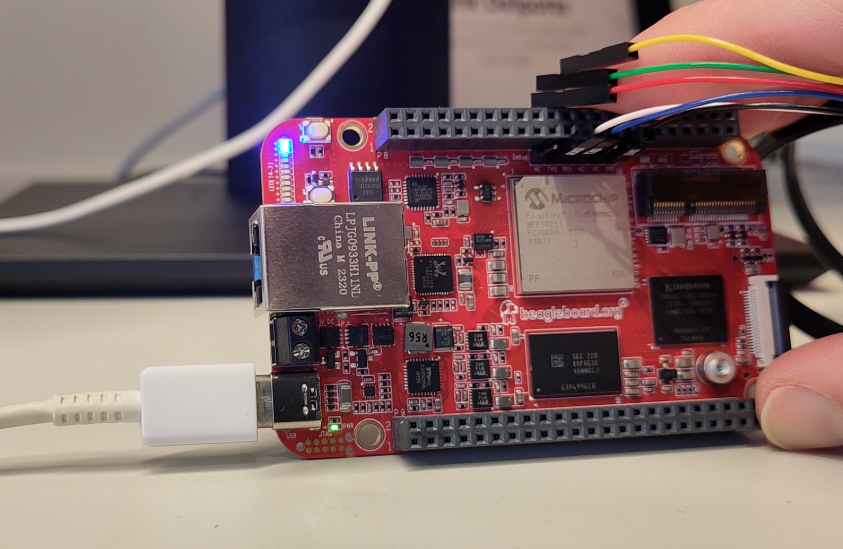
You also need a USB-to-USB cable to connect the board to your computer.
Failed With macOS
I initially tried connecting the board to my Apple workstation via USB. Despite the USB-to-serial cable being detected, I ran into issues:
% ls -l /dev/tty.*
crw-rw-rw-  1 root  wheel  0x9000002 Jan 19 09:15 /dev/tty.Bluetooth-Incoming-Port
crw-rw-rw-  1 root  wheel  0x9000000 Jan 19 09:13 /dev/tty.debug-console
crw-rw-rw-  1 root  wheel  0x9000004 Feb 10 16:19 /dev/tty.usbserial-BG02SIJE

% screen /dev/tty.usbserial-BG02SIJE 115200
The board itself never appeared as a USB drive, so the BeagleBoard Imaging Utility didn’t detect it, and while I could start a screen session, no output from the BeagleBoard appeared. This could be a macOS-specific issue, related to security not allowing such USB devices, so I switched strategies.
Succeeded With Linux
On a Linux machine, everything worked as expected! The USB-to-serial cable was properly detected, something you can easily verify with the dmesg command:
$ dmesg
[4:58 PM][2353475.078097] usb 1-5: new full-speed USB device number 7 using xhci_hcd
[2353475.210940] usb 1-5: New USB device found, idVendor=0403, idProduct=6001, bcdDevice= 6.00
[2353475.210946] usb 1-5: New USB device strings: Mfr=1, Product=2, SerialNumber=3
[2353475.210948] usb 1-5: Product: FT232R USB UART
[2353475.210950] usb 1-5: Manufacturer: FTDI
[2353475.210951] usb 1-5: SerialNumber: BG02SIJE
[2353475.266287] usbcore: registered new interface driver usbserial_generic
[2353475.266305] usbserial: USB Serial support registered for generic
[2353475.269477] usbcore: registered new interface driver ftdi_sio
[2353475.269497] usbserial: USB Serial support registered for FTDI USB Serial Device
[2353475.269533] ftdi_sio 1-5:1.0: FTDI USB Serial Device converter detected
[2353475.269571] usb 1-5: Detected FT232R
[2353475.270001] usb 1-5: FTDI USB Serial Device converter now attached to ttyUSB0

$ sudo apt install screen
$ sudo screen /dev/ttyUSB0 115200
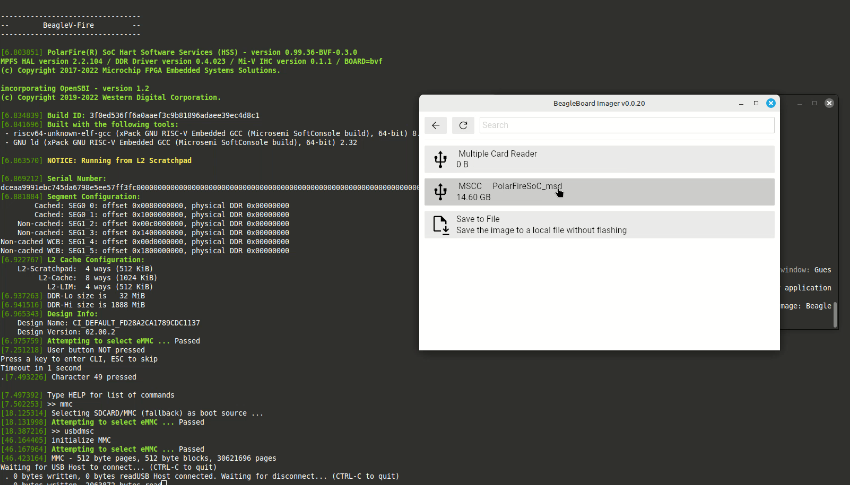
With the serial connection established, check the board output in the screen session and wait for the message Press a key to enter CLI to appear. You have one second to react, so be fast! :-)
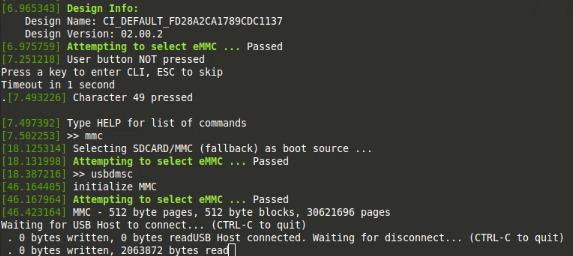
Then type in the following two commands:
>> mmc
>> usbdmsc
Now the board should appear as a USB drive on your computer and as a device in the Imaging Utility for an OS update. I had to do this twice because Wi-Fi was enabled, which caused an error at the end of the first attempt. After disabling the Wi-Fi settings, the update succeeded, and the board rebooted to Ubuntu 24!
Installing Java 25
Once Ubuntu 24 was up and running on the BeagleV-Fire, installing Java 25 was straightforward using the standard apt install command. Java 25 is the latest Long-Term Support (LTS) version, meaning it will be maintained for a long time. While Java 26 will be released in March, that’s a short-term version with only six months of support. I’m happy to start with Java 25 on this board, though Java 26 should work just as well once it becomes available through apt.
I also installed SDKMAN and JBang to test a few of the Pi4J JBang examples.
sudo apt update
sudo apt upgrade
sudo apt install zip
curl -s "https://get.sdkman.io" | bash

# Close the terminal and open a new one
sdk install jbang

# Install OpenJDK 25
sudo apt install openjdk-25-jdk

# Get the Pi4J JBang repository
git clone https://github.com/Pi4J/pi4j-jbang.git
cd pi4j-jbang
cd basic
java HelloWorld.java
jbang HelloJavaFXWorld.java
What’s Next: Performance Testing
Now that I have Java 25 running on both ARM and RISC-V boards, the big question remains: how do they compare in terms of performance? That’s exactly what I plan to explore throughout 2026. My goal is to create a reusable Java performance test that I can run across all these single-board computers to compare:
- ARM processors (like the BeagleY-AI and Raspberry Pi)
- RISC-V processors (like the BeagleV-Fire and BeagleV Ahead)
- Eventually, x86 processors on single-board computers as well
This will help us understand what’s achievable with these affordable single-board computers and which architecture performs best for Java development, and which board is the best choice for a specific use case.
Conclusion
Getting Java running on RISC-V is a reality! While the process required a few extra steps compared to ARM boards, the BeagleV-Fire is now running Ubuntu 24 with Java 25 and is ready for experimentation.
If you’re interested in following along with my “2026 single-board computer testing plan”, or if you have specific tests you’d like me to run, please let me know! Don’t forget to subscribe to my YouTube channel for future updates.