First Experiments with Java on the LattePanda IOTA: An Alternative to Raspberry Pi?

After years of experimenting with Raspberry Pi boards, Java, JavaFX, and Pi4J to control electronics, I wanted to explore whether my knowledge and experience could be applied to similar boards from other providers. There are many alternatives available these days, based on ARM, Intel processors, and RISC-V architectures.
I reached out to several suppliers to see if I could get evaluation copies, and I’m happy to share that I received my first box from DFRobot containing the LattePanda IOTA.
Unboxing the LattePanda IOTA
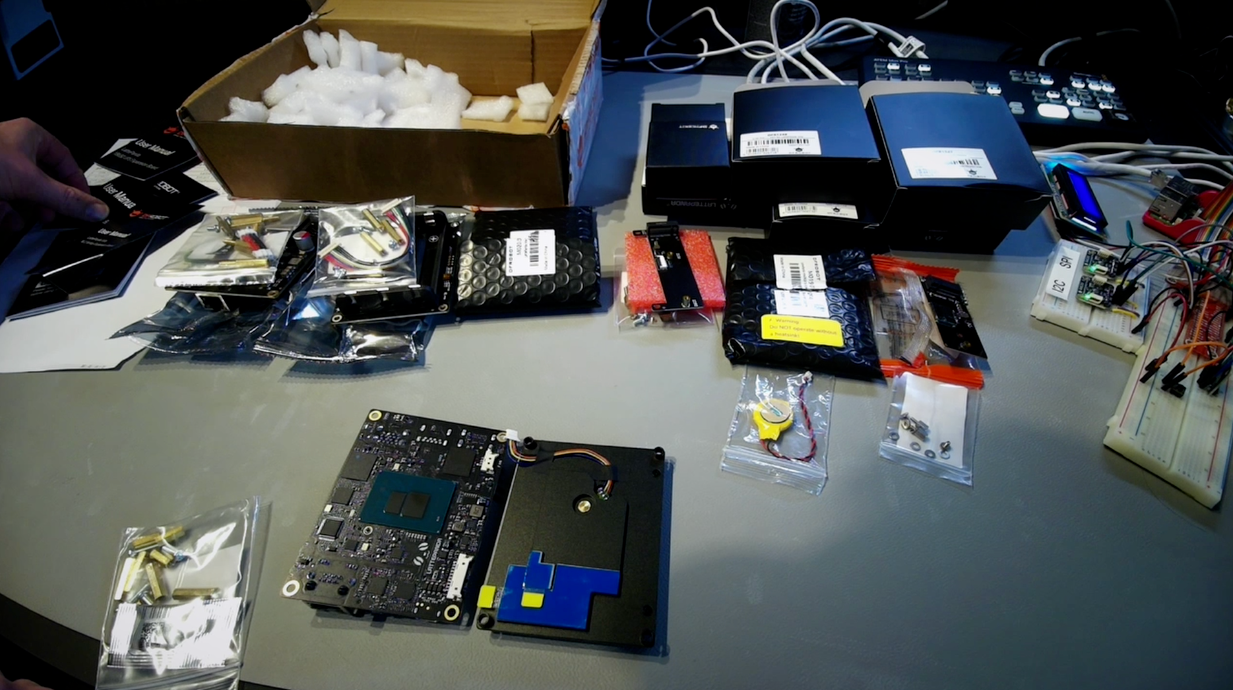
The box contained multiple smaller boxes, but the most important one was the LattePanda IOTA board itself, based on an Intel Twin Lake N150 quad-core processor (up to 3.6GHz). It has a clear warning on the packaging: “Do not operate without a heatsink”. This thing will definitely get hot if you ignore that warning I guess ;-)
The board is a bit bigger than a Raspberry Pi and appears very well-made. It has:
- A GPIO header (similar to Raspberry Pi, though the pin numbering is different)
- Network connection
- Connections for storage options and other expansions
- Three USB ports
- A full-size HDMI connector (more convenient than the mini or micro HDMI on Raspberry Pi)
In the same box, I also received:
- M2 expansion board: for extra storage
- Active cooler: essential to prevent overheating
- UPS hat: for battery backup functionality
- Power over Ethernet shield: handy, will test later
- 4G LTE module with SIM card support
The cooling fan has a nice logo and excellent build quality. The PoE shield connects directly to a new network connector on the board, which differs from Raspberry Pi expansion boards that use the Pi’s existing network connection.
Assembly
Following the documentation, I applied thermal paste to the processor, attached the cooling fan, and connected the M2 expansion board.
Setting Up The Board
First Boot: Windows Pre-installed
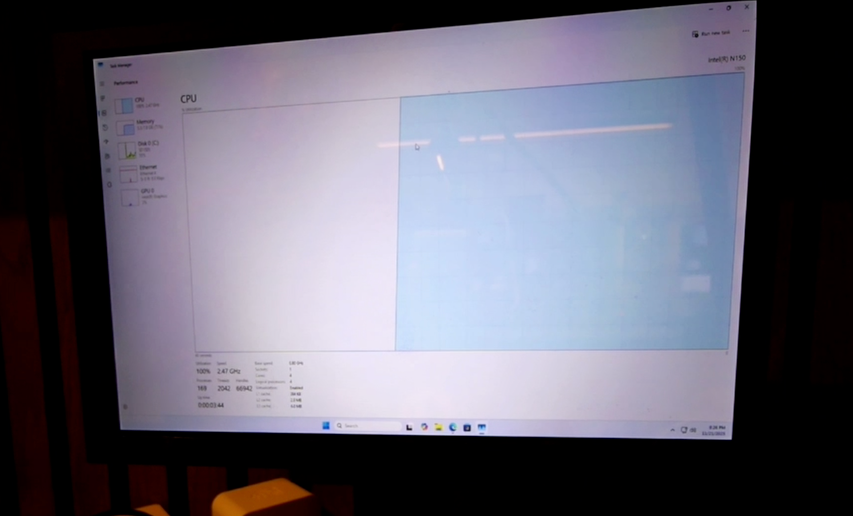
After finding the power button, the LattePanda logo appeared on screen, and… Windows started booting. Windows was pre-installed, though I’m not sure if this is default or just for evaluation units. Either way, I immediately noticed 100% CPU usage, the exact reason I left Windows long ago, as I never understood that it’s an every-ongoing problem with Windows… Memory usage was also pretty high.
This thing definitely works with Windows, but I don’t use Windows myself. Time to turn this into a Linux device.
Installing Ubuntu
I put the latest Ubuntu system on a USB stick to boot from it, restarted the device, and kept pressing the delete button to enter the BIOS. The system recognized the USB drive immediately. After selecting it and choosing “Save and exit”, it booted into Ubuntu installation mode. A few configuration steps later, I had a nice combination: LattePanda running Ubuntu.
Setting Up Java Development
As expected, Java isn’t pre-installed in Ubuntu, but several installation options were suggested. However, there’s an easier way to prepare a Linux embedded board like this or a Raspberry Pi for Java development: the Pi4J OS repository.
This repository contains scripts to set up boards for Java development, making it easy to have everything prepared and ready to start. There are two scripts available:
- One for Raspberry Pi
- One for non-Raspberry Pi boards
Using the second option, curl downloads and executes the script for non-Raspberry Pi boards with the following command:
curl -sL https://raw.githubusercontent.com/Pi4J/pi4j-os/main/script/prepare-for-java-non-rpi.sh | bash
This performs:
- System update
- Installation of extra dependencies for Java and I2C
- SDKMAN installation
- Java installation
- Maven installation
- JBang installation
I also installed Visual Studio Code, the preferred Java editor for this kind of board because it’s lightweight and has excellent extensions for Java and JavaFX applications. These are the recommended extensions for Java development:
- Extension Pack for Java: Installs many tools for Java development
- JBang: To execute JBang code directly from VS Code
Testing Java, JavaFX, and Pi4J
I cloned the Pi4J JBang examples project and opened it in Visual Studio Code, to execute code in an easy way.
HelloWorld with JBang
The simple “Hello World” example ran perfectly. There’s also an extended example using the Jackson library for JSON parsing, demonstrating how JBang can create single-file applications with dependencies, without needing a full Maven or Gradle project.
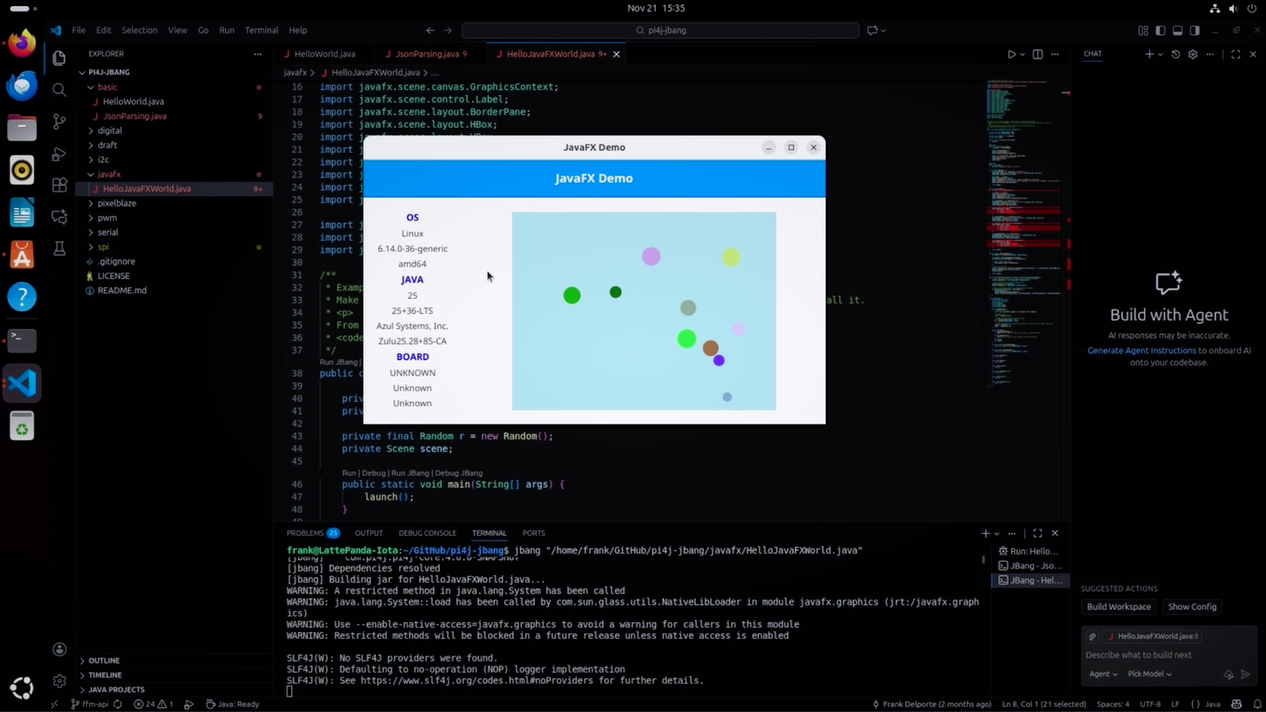
JavaFX Test
Since I installed the Java version from Azul with JavaFX included, I could also run a JavaFX demo application. It uses Pi4J to detect the board type, though this only contains methods to detect Raspberry Pi board versions at this moment, so it didn’t recognize the LattePanda.
But the application ran smoothly! It showed we’re running on a Linux 64-bit system with Java 25. The board wasn’t recognized yet as expected, maybe we can in the future add detection tools in the Pi4J library to show the brand or manufacturer information.
Without any extra work, we have a JavaFX application running very smoothly on this board!
Pi4J Test
Now for the fun part: let’s see what happens when we run something Pi4J-specific. I tried a project that uses an RGB-LED and changes colors. It compiled, but gave errors about user groups not being configured correctly. This was expected, I’ve never tried Pi4J on a non-Raspberry Pi single-board-computer before, so I wasn’t expecting it to work on the first attempt.
This is something I’ll dive into further and post follow-up videos about what can be achieved with the Pi4J library on boards like this.
Performance Check
With htop, I checked the CPU usage. Compared to Windows using 100% CPU, we have here in an idle state almost nothing. There’s a lot of room for applications we can run on this board. Great!!!
Conclusion
This was the first quick test, and it only took me about an hour to unbox everything, assemble it, and do this recording. Very promising results:
- Java runs perfectly
- JavaFX runs very smoothly
- Pi4J not working yet, but that was expected :-)
The next step will be to see what configuration changes are needed, either on the system level or within Pi4J itself. I’m very happy with this first result. The LattePanda IOTA is a very good-looking board, well-made, and comes with a good fan. You don’t hear it running during normal usage, it only ramps up when you start demanding applications.
Promising results! I’m looking forward to experiment more with this and similar board to see what’s possible with Java(FX) and Pi4J on alternative hardware platforms.
Stay tuned for follow-up videos and blog posts!